NetBeans provides support for creating and maintaining relational
databases by embedding the Apache Derby DBMS in the IDE.
This presentation describes how to use Apache Derby in NetBeans and
concludes with an exercise installing the data tables from
the
Cars database described in the
Introduction to SQL
lecture.
- Apache Derby is an open source relational database
- Implemented entirely in Java
- Small footprint — about 2 megabytes for the base engine and JDBC
driver.
- Based on Java, JDBC, and SQL standards
- Can be run in embedded or network mode
- Bundled with NetBeans.
Apache Derby is called "
Java DB" in NetBeans.
To manage Java DB, expose the
Services tab in the upper left
window of the IDE and open the
Databases node:

- You should see Java DB in the Databases tree.
- Right click Java DB to start and stop the database server
(it may already be running).

When the Java DB server is running, you should see a tab
labeled
Java DB Database
Process at the bottom of the IDE in the output area:

Note the version of Derby that is running. (In this case it is 10.5.)
NetBeans bundles a sample database with the IDE.
Under the
Databases tree, look for
jdbc:derby://localhost:1527/sample.
Right-click the sample database and select
Connect...:

A database connection will be created and a node labeled
APP will
appear under the database node in the tree.
- Open the APP node to reveal folders
for Tables, Views,
and Procedures.
- Open the Tables folder to reveal some tables for a business
application:

You can see a table's columns by opening a table node.
Here is the result of opening the
CUSTOMER table:

If you right click a table column node and choose
Properties:

you can view the column constraints:

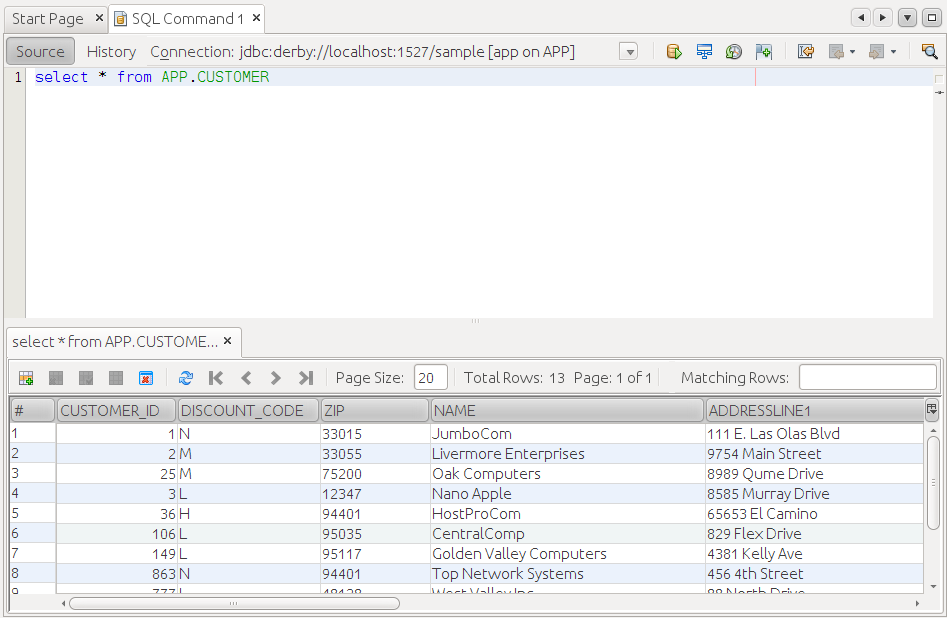
You can view the contents of a table by
right clicking the table node and choosing
View Data...:

Requesting to view a table's data generates an
SQL Command
window.
A
select statement is generated, placed in the command window,
and then executed.
The result is displayed in the bottom of the window:

To create a new database, right click the
Java DB node and
select
Create Database...

To create a new, empty, database, provide a database name, user name,
and password.
In a later section we will install the
Cars data tables
described in the
SQL Lecture
Notes.
To create this database:

While the choice of user name is up to you, "
app" is appropriate
since the database is to be used by a web application.
Be sure to remember the database name, user name, and password, as they
are necessary in order to create a data source (discussed later).
To connect:

Here is a NetBeans project with files containing SQL statements to
create, populate, and query the data tables in the
Cars
database:
Note: Both of these unzip to a folder called
Cars.
This section describes how to install the
Cars data in Java DB
(Apache Derby) using NetBeans.
Unzip
Cars.zip and open the resulting
Cars project folder
in NetBeans.
This project is a full web application that will be described later.
For now, look at the
SQL folder under
Source Packages:

Recall that referencing foreign keys creates table dependencies:

We'll install the tables in the following order:
- manufacturer
- model
- car
- person
- ownership
This section describes the process of creating, populating, and viewing
the manufacturer table.
Right click
manufacturer-create.sql and select
Open:

The
manufacturer-create.sql file will be opened in a new tab.
You need to select the database connection to be used with this file:

To run the contents of the file, click the

icon:

Note: the

icon
is active only if the input cursor is not in the file window.
You should see confirmation of the table creation in an output tab
below the file:

Repeat this process for the
manufacturer-insert.sql
and
manufacturer-select.sql files.
You should see:

To install the
model table and its data, run the following in
order:
- model-create.sql
- model-insert.sql
- model-view.sql
Note: If you are using Apache Derby 10.6 or later, an
INSERT
statement that uses a
SELECT subquery may not work without
a "
FETCH FIRST ROW ONLY" clause. Example:
   INSERT INTO model ("name", manufacturer)
   VALUES (
     'Camry',
     (SELECT manufacturer.id FROM manufacturer
      WHERE manufacturer."name" = 'Toyota'
      FETCH FIRST ROW ONLY
     ));
Successful running of the three files above should produce:

To install the
car table and its data, run the following in
order:
- car-create.sql
- car-insert.sql
- car-view.sql
Successful running of the three files above should produce:

To install the
person table and its data, run the following in
order:
- person-create.sql
- person-insert.sql
- person-select.sql
Successful running of the three files above should produce:

To install the
ownership table and its data, run the following in
order:
- ownership-create.sql
- ownership-insert.sql
- ownership-view.sql
Successful running of the three files above should produce:


 Note the version of Derby that is running. (In this case it is 10.5.)


 you can view the column constraints:


 While the choice of user name is up to you, "app" is appropriate
since the database is to be used by a web application.
Be sure to remember the database name, user name, and password, as they
are necessary in order to create a data source (discussed later).


 We'll install the tables in the following order:


 Note: the


